How to fix iphone water damage without rice where cannot turn off or on and screen not working

iphone-in-fish-tank

(firstly I thought the picture to be appropriate considering this true story)

You might laugh at me but I was having a nanny nap with my son, and as I was drifting off, I went to put the phone on his bedside table.

I realized that the table should have been lower than where my hand stopped and then fully waking and realizing, I was putting the phone into a fish tank.
Being so tired, I put the phone down and didn’t even turn it off. (which that should be the first thing you do with water damage).

When I woke in the morning it would not turn on (even though about 80% battery left) – there was still water dripping out of power and sound buttons (not good!)
Plugged in the power and turned on but kept rebooting so I quickly powered back off.

Stuck the phone in rice for a few hours and still no good. Even got a heat gun over the phone.

This is where it went well and this is 12 hours after the incident. I then proceeded to get an air compressor and blow out any water I could (without pulling apart).
The touch screen become a little responsive but started rebooting again. I even had MORE water marks and streaks on the LCD between the touchscreen and LCD (internal)

Now this is the fix for a water damaged iPhone which might even work on Android/Samsung but not tested.
I could get the water dried, it wasn’t a hot day either. So I placed the phone on the dashboard of the car, closed all windows and got the phone as hot as possible.

After a couple of hours I went to the car and tried turning it on…. Guess what – it said TEMPERATURE TOO HOT… I thought good, lets leave it there for most of the day.

Went back 4 hours later, not only did it turn on, the screen was working perfect and even better, all the water streaks were gone. Its just like the new screen I paid $200 for 2 weeks ago on teh same phone.

Hopefully this will help someone else.

(PS I am extremely careful with my phones, and in 3 years, two incidents in two weeks… Argh!)

How secure is my password and how long will it take to crack?

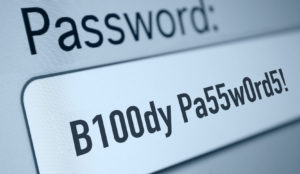
easy-password-to-crack

This topic comes up quite a fair bit some some clients. They do not realise the risk of having simple passwords until it’s too late.

It also means people can be looking at your data without even knowing.

We recommend passwords at a minimim to be 6 characters (however we recommend 8) , and also to have upper, lower, alphanumber and special characters in the password.
The password %^@gtgTT is easier to crack than aaaaaaaaaaaaaaaaaaaaaaaaaaaaaaaaaaaaaaaaaaaaaa

The reason is only because of length not complexity.
Here is some examples of weak passwords used in 2015.

To see how hard it is to crack your password, click this link and it will take you external to our site using a calculator to see how long it takes.

Changing the window Menu Bar to a different colour instead of white like in Windows 7 so not hard to find and move windows for Windows 10

windows-menu-sterling

With Windows 8/8.1 this process was quite difficult and if running Windows 8/8.1, we recommend upgrading before July 29th 2016 to get free upgrade

Now, you can simply open the Settings app, navigate to Personalization > Colors, and activate the “Show color on Start, taskbar, action center, and title bar” option.
You can also choose the color you want to use from the Colors screen.

Simple.

Petya Ransomware, worst than Cryptolocker as will try and encrypt whole drive or most files.

petya_ransomware

This Petya ransomware will kill the Master Boot Record making your hard disk useless. If this fails, it will then run a file-encypting program

Petya is an unusual ransomware threat that first popped up on security researchers’ radar in March. Instead of encrypting a user’s files directly, it encrypts the master file table (MFT) used by NTFS disk partitions to hold information about file names, sizes and location on the physical disk.

Before encrypting the MFT, Petya replaces the computer’s master boot record (MBR), which contains code that initiates the operating system’s bootloader. Petya replaces it with its own malicious code that displays the ransom note and leaves computers unable to boot.

However, in order to overwrite the MBR after it infects a computer, the malware needs to obtain administrator privileges. It does so by asking users for access via the User Account Control (UAC) mechanism in Windows.

In previous versions, if Petya failed to obtain administrator privileges, it stopped the infection routine. However, in such a case, the latest variant installs another ransomware program, dubbed Mischa, that begins to encrypt users’ files directly, an operation that doesn’t require special privileges.

The ransom that Mischa currently asks is approx 2 bitcoins, or around US$900

Another thing that sets Mischa apart is that it encrypts executable (.EXE) files in addition to documents, pictures, videos and other user-generated files typically targeted by ransomware programs. This has the potential to leave installed programs and the OS in a non-functional state, making it harder to pay the ransom from the affected system.

The installer for the Petya-Mischa combo is distributed via spam emails that pose as job applications.
These emails contain a link to an online file storage service that hosts a picture of the alleged applicant and a malicious executable file that masquerades as a PDF document.

If it’s downloaded and executed, the fake PDF file first tries to install Petya and if that fails, it installs Mischa.
There is currently no known way to restore files encrypted by Mischa without paying the ransom.


Computer not starting? Computer POST and beep codes decoded

computer

Computer POST and beep codes

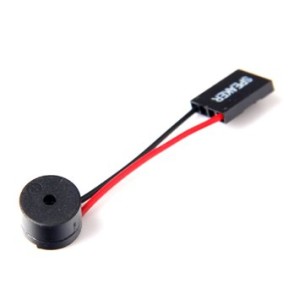
The computer POST (power-on self-test) checks a computer’s hardware for compatibility and connection before starting the remainder of the boot process. When the computer is working and passes POST, the computer may give a single or two beepsas it starts and continue to boot. If fails the POST, the computer will either not beep or generate a beep code that tells the user the source of the problem.

Below are a list of some vendors and the post code explanations.

AMI BIOS beep codes

Below are the AMI BIOS Beep codes that can occur. However, because of the wide variety of different computer manufacturers with this BIOS, the beep codes may vary.

Beep Code Descriptions
1 short DRAM refresh failure
2 short Parity circuit failure
3 short Base 64K RAM failure
4 short System timer failure
5 short Process failure
6 short Keyboard controller Gate A20 error
7 short Virtual mode exception error
8 short Display memory Read/Write test failure
9 short ROM BIOS checksum failure
10 short CMOS shutdown Read/Write error
11 short Cache Memory error
1 long, 3 short Conventional/Extended memory failure
1 long, 8 short Display/Retrace test failed
two-tone siren Low CPU Fan speed, Voltage Level issue

AWARD BIOS beep codes

Below are Award BIOS Beep codes that can occur. However, because of the wide variety of different computer manufacturers with this BIOS, the beep codes may vary.

Beep Code Description
1 long, 2 short Indicates a video error has occurred and the BIOS cannot initialize the video screen to display any additional information
1 long, 3 short Video card not detected (reseat video card) or bad video card
Beeps repeating endlessly RAM problem.
Repeated high frequency beeps while PC is running Overheating processor (CPU)
Repeated beeps alternating high & low frequency Issue with the processor (CPU), possibly damaged

If any other correctable hardware issues are found, the BIOS displays a message.

Dell beep codes

Beep Code Description
1 beep BIOS ROM corruption or failure
2 beeps Memory (RAM) not detected
3 beeps Motherboard failure
4 beeps Memory (RAM) failure
5 beeps CMOS Battery failure
6 beeps Video card failure
7 beeps Bad processor (CPU)

For other Dell beep codes, please refer to Dell’s Beep Codes and PSA Diagnostics Chart page.

IBM BIOS beep codes

Below are general IBM BIOS Beep codes that can occur. However, because of the wide variety of models shipping with this BIOS, the beep codes may vary.

Beep Code Description
No Beeps No Power, Loose Card, or Short.
1 Short Beep Normal POST, computer is ok.
2 Short Beep POST error, review screen for error code.
Continuous Beep No Power, Loose Card, or Short.
Repeating Short Beep No Power, Loose Card, or Short.
1 Long and 1 Short Beep Motherboard issue.
1 Long and 2 Short Beeps Video (Mono/CGA Display Circuitry) issue.
1 Long and 3 Short Beeps. Video (EGA) Display Circuitry.
3 Long Beeps Keyboard or Keyboard card error.
1 Beep, Blank or Incorrect Display Video Display Circuitry.

Macintosh startup tones

Tones Error
Error Tone. (two sets of different tones) Problem with logic board or SCSI bus.
Startup tone, drive spins, no video Problem with video controller.
Powers on, no tone. Logic board problem.
High Tone, four higher tones. Problem with SIMM.

Phoenix BIOS beep codes

Below are the beep codes for Phoenix BIOS

Beep Code Description and what to check
1-1-1-1 Unconfirmed beep code. Reseat RAM chips or replace RAM chips as possible solution
1-1-1-3 Verify Real Mode.
1-1-2-1 Get CPU Type.
1-1-2-3 Initialize system hardware.
1-1-3-1 Initialize chipset registers with initial POST values.
1-1-3-2 Set in POST flag.
1-1-3-3 Initialize CPU registers.
1-1-4-1 Initialize cache to initial POST values.
1-1-4-3 Initialize I/O.
1-2-1-1 Initialize Power Management.
1-2-1-2 Load alternate registers with initial POST values.
1-2-1-3 Jump to UserPatch0.
1-2-2-1 Initialize keyboard controller.
1-2-2-3 BIOS ROM checksum.
1-2-3-1 8254 timer initialization.
1-2-3-3 8237 DMA controller initialization.
1-2-4-1 Reset Programmable Interrupt Controller.
1-3-1-1 Test DRAM refresh.
1-3-1-3 Test 8742 Keyboard Controller.
1-3-2-1 Set ES segment to register to 4 GB.
1-3-3-1 28 Autosize DRAM.
1-3-3-3 Clear 512K base RAM.
1-3-4-1 Test 512 base address lines.
1-3-4-3 Test 512K base memory.
1-4-1-3 Test CPU bus-clock frequency.
1-4-2-4 Reinitialize the chipset.
1-4-3-1 Shadow system BIOS ROM.
1-4-3-2 Reinitialize the cache.
1-4-3-3 Autosize cache.
1-4-4-1 Configure advanced chipset registers.
1-4-4-2 Load alternate registers with CMOS values.
2-1-1-1 Set Initial CPU speed.
2-1-1-3 Initialize interrupt vectors.
2-1-2-1 Initialize BIOS interrupts.
2-1-2-3 Check ROM copyright notice.
2-1-2-4 Initialize manager for PCI Options ROMs.
2-1-3-1 Check video configuration against CMOS.
2-1-3-2 Initialize PCI bus and devices.
2-1-3-3 Initialize all video adapters in system.
2-1-4-1 Shadow video BIOS ROM.
2-1-4-3 Display copyright notice.
2-2-1-1 Display CPU Type and speed.
2-2-1-3 Test keyboard.
2-2-2-1 Set key click if enabled.
2-2-2-3 56 Enable keyboard.
2-2-3-1 Test for unexpected interrupts.
2-2-3-3 Display prompt Press F2 to enter SETUP.
2-2-4-1 Test RAM between 512 and 640k.
2-3-1-1 Test expanded memory.
2-3-1-3 Test extended memory address lines.
2-3-2-1 Jump to UserPatch1.
2-3-2-3 Configure advanced cache registers.
2-3-3-1 Enable external and CPU caches.
2-3-3-3 Display external cache size.
2-3-4-1 Display shadow message.
2-3-4-3 Display non-disposable segments.
2-4-1-1 Display error messages.
2-4-1-3 Check for configuration errors.
2-4-2-1 Test real-time clock.
2-4-2-3 Check for keyboard errors
2-4-4-1 Set up hardware interrupts vectors.
2-4-4-3 Test coprocessor if present.
3-1-1-1 Disable onboard I/O ports.
3-1-1-3 Detect and install external RS232 ports.
3-1-2-1 Detect and install external parallel ports.
3-1-2-3 Re-initialize onboard I/O ports.
3-1-3-1 Initialize BIOS Data Area.
3-1-3-3 Initialize Extended BIOS Data Area.
3-1-4-1 Initialize floppy controller.
3-2-1-1 Initialize hard disk controller.
3-2-1-2 Initialize local bus hard disk controller.
3-2-1-3 Jump to UserPatch2.
3-2-2-1 Disable A20 address line.
3-2-2-3 Clear huge ES segment register.
3-2-3-1 Search for option ROMs.
3-2-3-3 Shadow option ROMs.
3-2-4-1 Set up Power Management.
3-2-4-3 Enable hardware interrupts.
3-3-1-1 Set time of day.
3-3-1-3 Check key lock.
3-3-3-1 Erase F2 prompt.
3-3-3-3 Scan for F2 key stroke.
3-3-4-1 Enter SETUP.
3-3-4-3 Clear in POST flag.
3-4-1-1 Check for errors
3-4-1-3 POST done – prepare to boot operating system.
3-4-2-1 One beep.
3-4-2-3 Check password (optional).
3-4-3-1 Clear global descriptor table.
3-4-4-1 Clear parity checkers.
3-4-4-3 Clear screen (optional).
3-4-4-4 Check virus and backup reminders.
4-1-1-1 Try to boot with INT 19.
4-2-1-1 Interrupt handler error.
4-2-1-3 Unknown interrupt error.
4-2-2-1 Pending interrupt error.
4-2-2-3 Initialize option ROM error.
4-2-3-1 Shutdown error.
4-2-3-3 Extended Block Move.
4-2-4-1 Shutdown 10 error.
4-3-1-3 Initialize the chipset.
4-3-1-4 Initialize refresh counter.
4-3-2-1 Check for Forced Flash.
4-3-2-2 Check HW status of ROM.
4-3-2-3 BIOS ROM is OK.
4-3-2-4 Do a complete RAM test.
4-3-3-1 Do OEM initialization.
4-3-3-2 Initialize interrupt controller.
4-3-3-3 Read in bootstrap code.
4-3-3-4 Initialize all vectors.
4-3-4-1 Boot the Flash program.
4-3-4-2 Initialize the boot device.
4-3-4-3 Boot code was read OK.
two-tone siren Low CPU Fan speed, Voltage Level issue