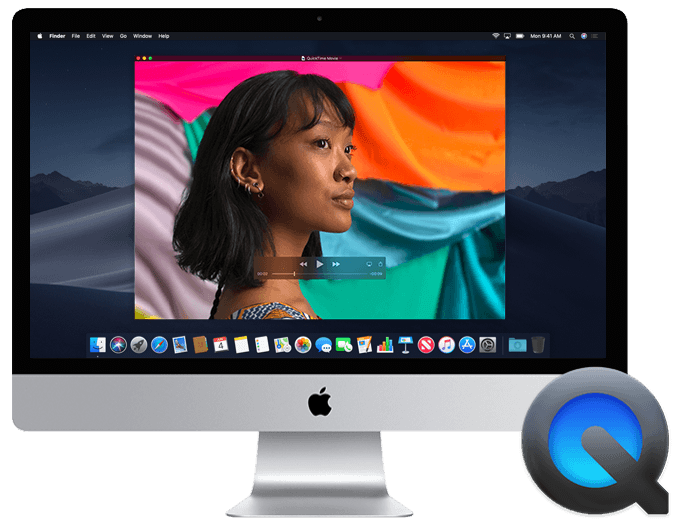
This method of mirroring is FREE and NO DOWNLOADS required. Using Quicktime not only can you mirror but a simple click and can record as well.
The only thing that is on the downside, is you must plug the phone in to the computer with your Apple cable.
Category: Apple
How to create a user or admin user in OSX Apple Mac via terminal commands in 9 simple steps
Adding a user to your system is quite simple via the GUI, however there may be times you wish to mass deploy or run via a script. Below shows the commands on how to do this. Adding a new user to a Mac computer from a Terminal window requires you to define the user’s name, set a password, create the user’s home directory and configure her system permissions.
Cannot RDP using OSX. RpcOverHttpEndpointException: 2, Your connection was denied because of a Resource Access Policy (TS_RAP). Please contact your server administrator
After spending many hours trying to resolve a Mac OSX system remoting to a 2012 R2 RDS/TS Server, we have found the fix.
When remoting in you may get the following error:
Cannot RDP using OSX. RpcOverHttpEndpointException: 2, Your connection was denied because of a Resource Access Policy (TS_RAP). Please contact your server administrator
This error is with Microsoft Remote Desktop on a Mac with version 8.0.28 that had been upgraded from 8.0.26.
Interestingly we didn’t have the problem on a fresh client that had 8.0.28 installed fresh and not upgraded from an earlier version.
Navigate and delete or move the following folder: (NOTE: doing so will delete all your preconfigs saved currently)
/Users/username/Library/Containers/com.microsoft.rdc.mac/
Then the next time that you load the client, you get a completely fresh client version, including first run prompts etc. You will need to re-create the profile and gateway however.
After doing that, we no longer get the ‘login failed’ popup.
It seems that something in the version upgrade doesn’t correctly upgrade the settings files, causing the issue. But a fresh setup works.
We haven’t yet found out exactly which file causes the issue however we have tested and can confirm this fix allows the system to connect and work.
Credit: Tony “tbigby” Bigby
Beware Apple iOS attacks using ‘Masque Attack’ techniques from uncertified apps
Researchers have discovered a technique that may enable attackers to substitute malware for a legitimate app on Apple iOS devices such as iPhones and iPads.
Although the risk of being subjected to a Masque Attack is low, it is another reminder not to download pirated apps or software from untrusted sources. It is also a reminder that Apple products are increasingly being targeted by attackers.
As many people believe you cannot get a virus/trojans/malware on Apple devices (more so on OSX), this is not true and Apple devices, due to their numbers, will and currently are being targeted. Sterling IT use and recommend Webroot and/or Trend Micro Antivirus to protect Apple Mac.
About Masque Attack
A Masque Attack can occur if a user downloads an app from a rogue source such as a link embedded in a phishing email or from an unofficial app site hosting fake ‘uncertified’ apps.
The Masque Attack takes advantage of a weakness in iOS security which can enable malware to be installed.
If a malicious app can be crafted to use the same ‘bundle identifier’ (an ID Apple uses to identify individual apps) as a legitimate app on your phone, Apple will not check its security certificate. It means that a malicious app can replace a legitimate app on your device.
A criminal using the Masque Attack technique will typically disguise their malware as a popular game or program for you to install. Only install via the APP STORE via your device.
Once installed it may be able to steal information from your device such as passwords or internet banking details and send them to a remote server controlled by criminals. Possible impacts include the malware being able to steal logon credentials; access sensitive data; avoid detection and steal Apple IDs and passwords.
Staying safe
- Do not download software or apps from untrusted sources. Sticking with Apple’s AppStore helps protect against downloading malicious software
- Do not click ‘install’ from pop ups when viewing a web page. Even if it tells you , that you have a virus. Most of these are traps.
Sterling IT has posted MANY emails recently with relation to this and unfortunately we are still getting clients infected, even with prior warning. - If your iOS device shows an ‘Untrusted App Developer’ alert when you open an app, click on ‘Don’t Trust’ and uninstall the app immediately.
- Use security software for all your computer and mobile devices.
- Keep your system up-to-date by downloading software updates as they are released.
- Do not connect or ‘pair’ your device with untrusted computers.
For FREE advice or any questions regards to this, please contact Sterling IT. You are better asking as prevention is better than cure!!
iOS malware discovered on unofficial Chinese download site
Researchers have discovered malware that affects Apple iOS devices such as iPhones and iPads connected via USB to an infected Mac OSX computer.
WireLurker, as it is called, is among just a few examples of malware that has been able to effectively target iOS devices. As a result, it has received significant media coverage. Apple has blocked apps identified as having the malware, and currently, the malware has been limited to fake apps on a third party download site, that is known to host pirated software, for Chinese users.
Although this is unlikely to affect Australian iOS users, it is a reminder that downloading pirated apps or software from untrusted sources is risky. It is also a reminder about the increasing attention Apple products receive from attackers.
About WireLurker
WireLurker is a form of malware called a Trojan, which can infect desktop or laptop computers if a fake app, hosted on the Chinese site, is downloaded. It then attempts to target and infect any iOS device connected to the computer via USB.
Malicious versions of well-known apps included Angry Birds, The Sims 3, International Snooker 2012, International Soccer 2014, Spider 3 and Bejeweled 3.
Once installed on your computer, the malware waits for you to connect your iPad or iPhone, before copying itself (or automatically generating malicious apps) on to your device. The malware can attempt to read and send your device’s serial number, phone number or other identifying information to a remote server controlled by the criminals.
If your device is jailbroken (modified to enable unofficial apps to be installed) other parts of the malware are installed and may attempt to extract information such as your message history, files, and address book.
An older strain of WireLurker has also been identified which targeted devices connected to Windows computers. The Windows version is older and less effective than the Mac OSX version. The Windows version has had very limited impact.
Apple has blocked these malicious apps, and most antivirus vendors have updated their products to address WireLurker malware. There is a very limited possibility of being affected by this malware.
Staying safe
• Do not download software or apps from untrusted sources. Sticking with Apple’s AppStore helps protect against downloading malicious software.
• Use security software for your computer and devices.
• Keep your system up-to-date.
• Do not Jailbreak your device.
• Do not connect or pair your device with untrusted computers.
Apple : Using Disk Utility to verify or repair disks
THIS HAS BEEN COPIED FROM APPLE WEBSITE FOR SOME OF OUR CLIENTS TO FIND IT EASIER
Source : https://support.apple.com/kb/ht1782
Learn about using Disk Utility to verify or repair disks.
Disk Utility can verify your computer’s startup disk (volume) without starting up from another volume. This feature is called “Live Verification.” If Disk Utility discovers any issues that require a repair, you will need to start up from your Mac OS X Install DVD and use Disk Utility on that disc to make repairs (You can’t repair your startup volume while your computer is started from it.).
Important things to remember
- Live Verification only works on Mac OS X Extended (Journaled)-formatted (HFS+J) volumes. If you try to verify a non-journaled disk, Disk Utility will display this message: “ERROR: could not freeze volume (Operation not supported).”
- During a Live Verification, the Disk Utility progress indicator may stop advancing, open applications may act slow or become unresponsive, the progress pointer (it looks like a spinning pinwheel) may appear, or your computer could appear to stop responding (“freeze”).
- Once you start a Live Verification, you may not be able to cancel it, depending on how far along it has progressed.
- You may experience some issues if you try to verify or repair any unmountable, non-startup disk.
- If you see any “Incorrect size for file temp” alerts, you can safely ignore them.
Issues may occur if you try to verify or repair unmountable disks
Disk Utility may stop responding without displaying an error message, or stall your computer for several seconds, when trying to verify or repair some non-startup volumes that can’t be unmounted.
If you try to verify a volume that is not your startup disk but for some reason Disk Utility can’t unmount the volume (for example, the disk may have open files), the verification will appear to start but then stop without displaying any alert message. If you look in the Console (/Applications/Utilities/), you will see an entry like this:
Verifying volume “Storage”
The disk “Storage” could not be unmounted
Could not unmount disk for verification, attempting live verify
If you try to repair a disk that cannot be unmounted, the repair will appear to start, but then stop as Disk Utility displays this message: “Repairing disk failed with error. Could not unmount disk.”
If you look in the Console (/Applications/Utilities/), you will see an entry like this:
Verify and Repair disk “Storage”
The disk “Storage” could not be unmounted
Could not unmount disk for verification
Repairing disk failed with error. Could not unmount disk
In some rare situations, your computer might not respond for several seconds.
If you cannot determine which files are open on the disk that you want to verify or repair, restart your computer and then mount the disk again, or start up from your Mac OS X Install DVD or CD to repair.
“Incorrect size for file temp” alerts can be safely ignored
You may notice some “Incorrect size for file tempnumber” alerts when you attempt to verify or repair a volume using Disk Utility or fsck_hfs with the “-l” option. You can safely ignore these alerts for any “tempnumber” files.
For example, you might see something like this:
Verifying volume “Macintosh HD”
Checking HFS Plus volume.
Checking Extents Overflow file.
Checking Catalog file.
Incorrect size for file temp420595
(It should be 0 instead of 84538)
Incorrect size for file temp468627
(It should be 0 instead of 16464)
Checking multi-linked files.
Checking Catalog hierarchy.
Checking volume bitmap.
Checking volume information.
The volume Macintosh HD needs to be repaired.
Error: The underlying task reported failure on exit
1 HFS volume checked
Volume needs repair
If this happens, use fsck in single user mode, or start up your computer from a different volume before verifying or repairing.
Advanced: This issue can happen because the on-disk size for truncated open-unlinked files doesn’t get updated before you start a live verification. The presence of these files doesn’t cause an issue because their in-memory size is correct. These files are deleted as soon as they are closed. If your computer does not shut down normally, they will be deleted during the next startup.


